Potential guests often interact with your social media platforms in the dreaming stage of the guest lifecycle. This is a great time for them to see beautiful, compelling images of your property and activities around your property. So today we are going to go over how to improve your Instagram strategy by creating high-quality images!
Understand the Lighting
Lighting can make all the difference in how much your photos stand out on Instagram and is a great way to improve your Instagram strategy. Natural lighting is always going to be best for photos; if you want your Instagram photos to look top-notch, get outside or open all your curtains. Natural light is more flattering to most skin tones and features in a room! Plus, if you’re taking photos indoors at a property, by opening the curtains for natural lighting you’re also able to highlight the beautiful view the property has.
If you’re photographing in a room that doesn’t have a lot of natural light, you can avoid buying expensive and cumbersome camera lighting by using a clip-on light to create better lighting.

However, if you’re unable to get the perfect lighting for your photo, it is best to under-expose it slightly as it is easier to edit an under-exposed photo than an over-exposed photo. To adjust exposure in your phone camera, tap your screen and move the sun icon next to it up or down to adjust exposure.
Know your Angles
The right angle can make your image more compelling no matter the subject. Many people claim shooting from hip height is best, that actually varies based on the height of what you’re photographing. For example, if you’re photographing a local mural that is floor to ceiling, it would be best to shoot from chest height. On the other hand, if you’re shooting something lower a hip height angle may be best. This is something you should absolutely play around with when you’re photographing your property for social media.
If you’re not capturing your property in a satisfactory way, or you want to capture a wide area without doing a panorama, you can purchase external lenses that will among other things help you capture wide-angle shots. External lenses are inexpensive and come in packs so that you will have several options for angles and perspectives when photographing your property.
Add Layers
Creating layers within an image will make your photo more interesting and draw more Instagram users to your profile. One of the ways you can do this is by placing an object in the foreground that’ll contrast with the background and then tapping the brightest part of your image to reset your phone’s autoexposure to a lower level. Alternatively, you can get creative with the depth of field (DOF) by tapping the subject on the screen until the yellow square appears; then you can the square around to change what or who is in focus.
Remember the Rule of Thirds
The rule of thirds states that “the human eye naturally gravitates to intersection points that occur when an image is split into thirds.” What this means for you when you’re photographing your property is that you will want to use the grid on your phone camera to properly position your subject close to the intersection points seen below:
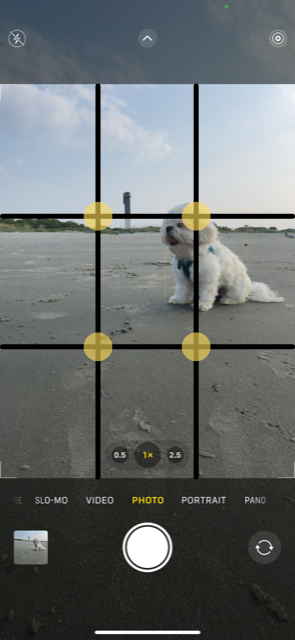
To set up a grid like the one above, go to the camera settings in your phone and turn on the grid function. If that is not possible, Instagram allows you to crop your image with the gridlines in the app. However, you’ll end with a higher-quality image if you set it up correctly when creating it.
An example of how to use the rule of thirds is when photographing a landscape: people tend to center the horizon line in the photo. However, it can be more visually appealing to place it along with one of the horizontal lines on your grid. Positioning of the image depends on if you’re highlighting the sky or what’s in the lower portion of your image. If you want to highlight the sky, position the horizon line along the lower grid line; if you’re trying to highlight the lower portion of the image position the horizon line on the upper grid line.
Watch Your Filter Usage
Filters and presets, such as the ones available on Instagram and photo-editing apps like Lightroom, are not a one-size-fits-all solution. Filters can bring out vibrant colors or details that your phone camera couldn’t capture on its own. The trick is to make some minor adjustments that compliment your image but don’t completely change it. This means avoiding intense vignettes, using multiple filters on the same image, or over-colorizing an image. For example, on the right you’ll see a photo that is heavily colorized and filtered, in the middle, you have the unedited photo, and on the left, you have a tastefully edited photo.
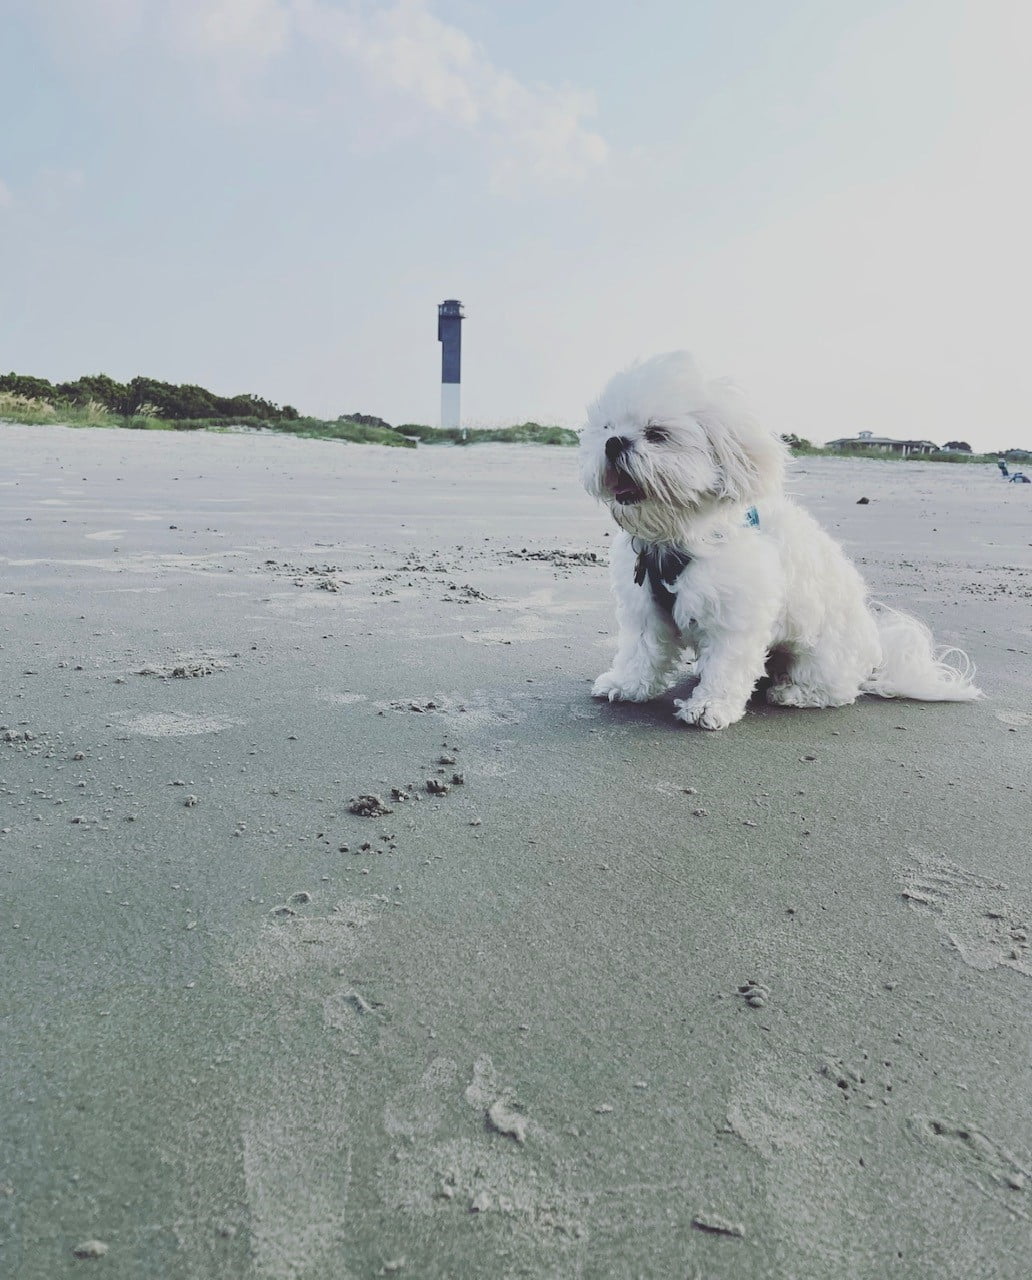
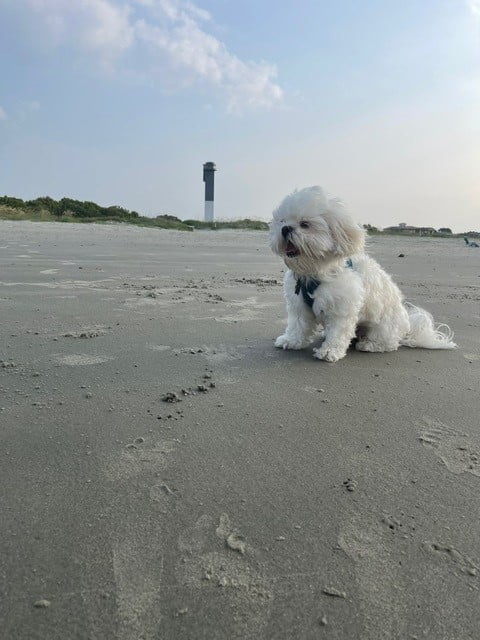

The problem with the photo on the left is that because of the filters on it, it appears over-exposed. There isn’t anything wrong with the middle image but compared to the image on the right, it’s just not as vibrant. How you decide to edit (or not) your photos for Instagram should be based on the aesthetic you want on your profile. In short, you want your images to flow well together when a potential guest looks at your profile. In the next blog of this series, we will take a deeper dive into how to improve your profile!
If you’re struggling to improve your Instagram strategy, and need help we offer a free Social Media Grader. This report will help you evaluate what you need to focus on.
Improve Your Instagram Strategy With Our Free Social Media Grader